Integrations
Homarr will integrate with a ton of different apps on your system.
Homarr usually does not suport beta, alpha or older legacy versions of integrations, because new versions often contain breaking API changes.
We will not support these, because the underyling API often changes frequently and would require much attention for very little outcome.
Torrent Clients
Homarr supports a total of 3 Torrent clients. You can use them to display your torrents directly on your dashboard and see if you are leeching / seeding.
Deluge
The Deluge integration is used by the following widgets:
Available configuration options
| Field | Type | Description |
|---|---|---|
| Password | Private | Used for authenticating with the Deluge service |
Transmission
The Transmission integration is used by the following widgets:
Available configuration options
| Field | Type | Description |
|---|---|---|
| Username | Private | Username used for authentication |
| Password | Private | Password used for authentication |
qBittorrent Integration
The qBittorrent integration is used by the following widgets:
Available configuration options
| Field | Type | Description |
|---|---|---|
| Username | Private | Username used for authentication |
| Password | Private | Password used for authentication |
Please note the known issue with qBittorrent: qBittorrent webUI showing Unauthorized
Usenet Clients
SABnzbd
The SABnzbd integration directly communicates with your download client and enables you to view and control your downloads directly from Homarr. You can use this integration from the Usenet Widget.
Available configuration options
| Field | Type | Description |
|---|---|---|
| ApiToken | Private | Token used for authentication |
NZBGet
The NZBGet integration directly communicates with your download client and enables you to view and control your downloads directly from Homarr. You can use this integration from the Usenet Widget.
Available configuration options
| Field | Type | Description |
|---|---|---|
| Username | Private | Username used for authentication |
| Password | Private | Password used for authentication |
Collection Managers
Sonarr
Homarr will integrate the shows of your Sonarr calendars in the Calendar Widget
Available configuration options
| Field | Type | Description |
|---|---|---|
| ApiToken | Private | Token used for authentication |
Radarr
Homarr will integrate the shows of your Radarr calendars in the Calendar Widget
Available configuration options
| Field | Type | Description |
|---|---|---|
| ApiToken | Private | Token used for authentication |
Lidarr
Homarr will integrate the shows of your Lidarr calendars in the Calendar Widget
Available configuration options
| Field | Type | Description |
|---|---|---|
| ApiToken | Private | Token used for authentication |
Readarr
Homarr will integrate the shows of your Readarr calendars in the Calendar Widget
Available configuration options
| Field | Type | Description |
|---|---|---|
| ApiToken | Private | Token used for authentication |
Dash.
The Dash. integration can be used to monitor the performance and used system resources of your machine. Dash. will be used in the Dash.
Overseerr & Jellyseerr
The Overseerr integration will enable you to request movies and series directly from your Homarr dashboard.

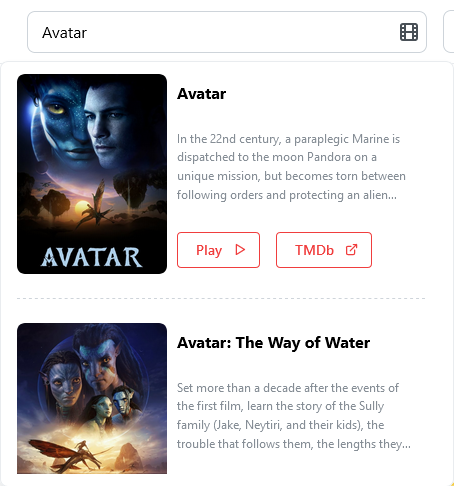
After choosing the correct type, you can search for content:

It displays, which content is already in your Overseerr library and links availble content directly to your Plex or Jellyfin instance.
Available configuration options
| Field | Type | Description |
|---|---|---|
| ApiToken | Private | Token used for authentication |
Initial setup
Installation of Media Server
The Overseer integration supports both Overseer and Jellyseer, a fork of Overseer compatible with Jellyfin.
- 🎬 Plex Media Server
- 🎬 Jellyfin Media Server
Install Plex on your machine using your preferred installation method: https://www.plex.tv/
We recommend the installation using Docker for the easiest and fastest installation.
Install Jellyfin on your machine using your preferred installation method: https://jellyfin.org/docs/general/administration/installing.html
We recommend the installation using Docker for the easiest and fastest installation.
Installation of Media requester
- 🎬 Plex Media Server
- 🎬 Jellyfin Media Server
After you have your Plex instance up and running, you must install Overseer as your media request application. Please read the official documentation of how to install Overseerr on your machine: https://docs.overseerr.dev/getting-started/installation.
Oficially, Jellyfin is not supported by Overseerr. This is why Jellyfin users must use a fork of the official Overseerr project, which was modified to work with Jellyfin: https://github.com/bignuto/jellyseer.
We recommend the installation using Docker for the easiest and fastest installation.
Add your application in Homarr
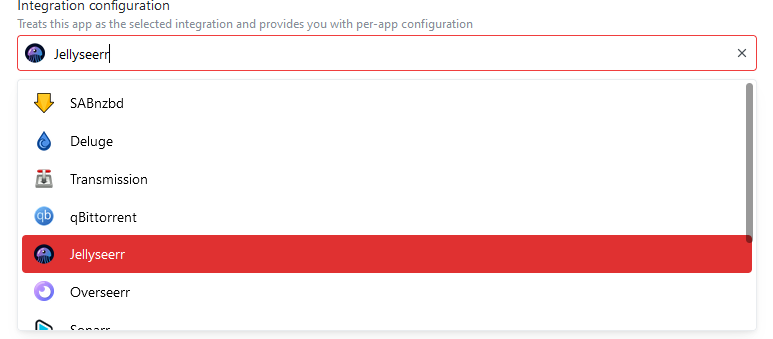
If your instance of Overseerr or Jellyseerr is up and running, it's time to add it to your dashboard. Simply select the correct type from the integration tab when editing the application:

- 🎬 Plex Media Server
- 🎬 Jellyfin Media Server
Select Overseerr in the app type for your Overseerr app.
Fill our the field Api token with from the link below, when having Overseerr as the app type selected.
Select Jellyseerr in the app type for your Jellyseer app.
Fill our the field Api token with from the link below, when having Jellyseerr as the app type selected.
Searching for a movie / series
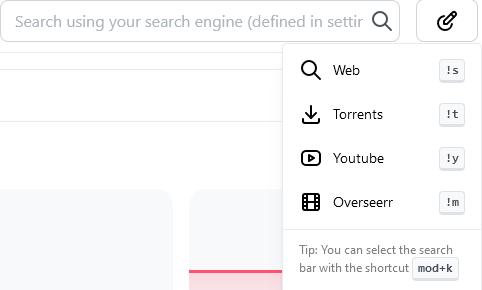
To search for a movie or series, simply press CTRL + K or click into the search box.
Then, type !os (with a space at the end) and enter, what you want to search for.
The integration will display, what content is already available in your media library.
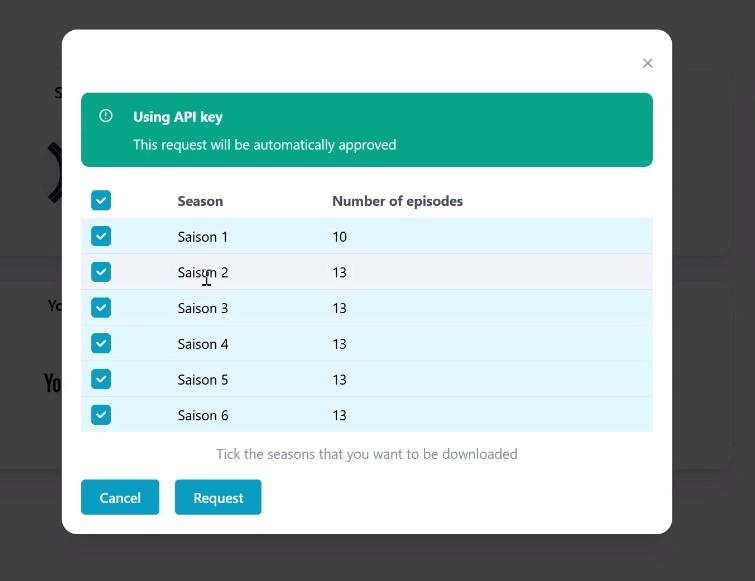
Seasons selection
If you're selecting a series, you'll be asked what seasons you want to request:

Docker
Homarr allows you to interact with Docker containers running on your system.
You can restart, stop, start, refresh and remove containers as well as add them to the Homarr dashboard

Additonally, if you have a lot of containers you can search and filter them by container or image name

View the state of each container (created, running or stopped)

And also check what ports the container has exposed (container port:external port)

Before you begin
In order for Homarr to be able to interact with your Docker instance you must tell Homarr the path to your Docker socket. You do this by adding the following to the Docker command when you first run Homarr:
-v /var/run/docker.sock:/var/run/docker.sock